Docs / Account Management
General
Manage your space's identity, the logo, the display name, and the unique Space ID used for API integrations. This article explains what each setting does, who can change it, and how to update it.
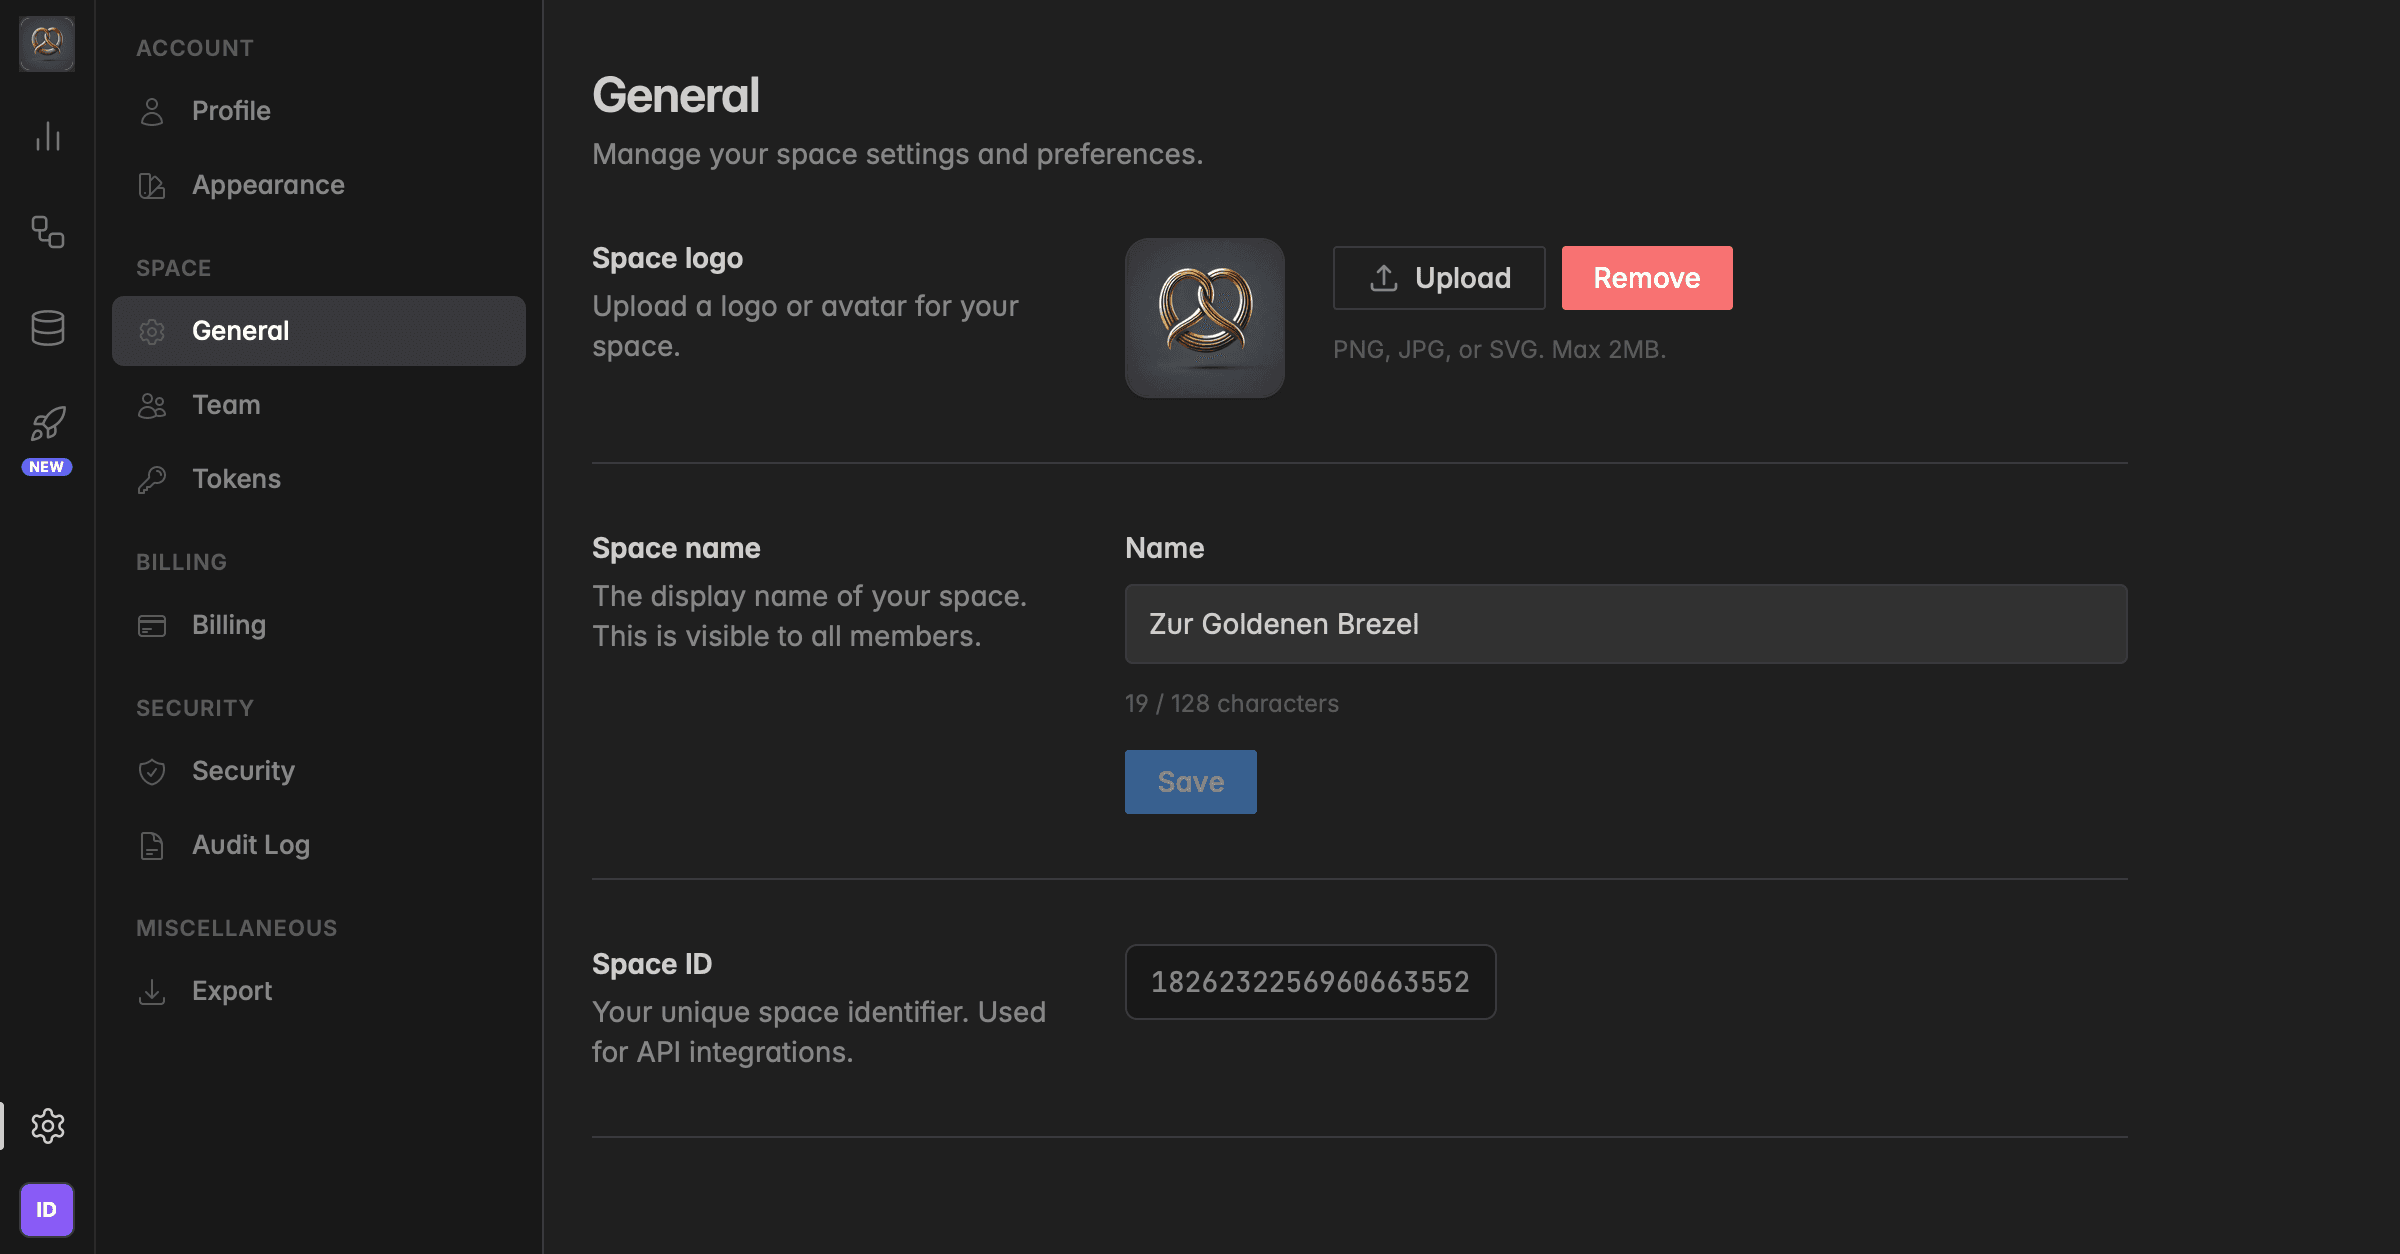
Space logo
The space logo is the avatar shown next to your space name in the sidebar and across the interface. A custom logo makes it easier for team members, especially those who belong to multiple spaces, to recognise the right workspace at a glance.
Requirements: PNG, JPG, or SVG. Maximum file size 2 MB. Square images work best.
How to upload a space logo
Open Settings by clicking the gear icon in the bottom-left corner.
Click
Generalunder the Space section in the sidebar.Next to Space logo, click
Uploadand choose your image.The new logo is applied immediately. Use
Removeto revert to the default avatar.
Space name
The display name of your space. It appears in the sidebar, in invitations, and in shared links, so pick something clear and recognisable for your team. Up to 128 characters.
How to change the space name
Go to
Settings→General.In the Space name field, enter the new name.
Click
Save.
Changes are visible to all space members immediately after saving.
Only Owners and Admins can change the space name and logo. Users and Readers can view General settings but cannot edit them. All changes are recorded in the Audit Log under the
Spacesnamespace.
Space ID
The Space ID is your workspace's unique identifier. You'll need it whenever you connect Indicate to an external system, for example when configuring API integrations or referencing your space in support requests.
Where to find it
Go to
Settings→General.Scroll down to the Space ID section.
Click the ID field and copy it to your clipboard.
The Space ID is read-only, it is generated when your space is created and cannot be changed or deleted. It stays the same for the lifetime of your workspace, so it's safe to hard-code into integrations.
Treat your Space ID as a public identifier. The Space ID alone does not grant access to your data, it identifies your workspace, but authentication still requires an API token. Sharing it with developers or support is safe, sharing API tokens is not.
Was this helpful?