
Agent Tokens
An agent token connects an external tool like Claude, n8n, or VS Code to your Indicate space. This article covers what agent tokens are, how to create one, how to connect it to your tool, and how to revoke it
What are agent tokens?
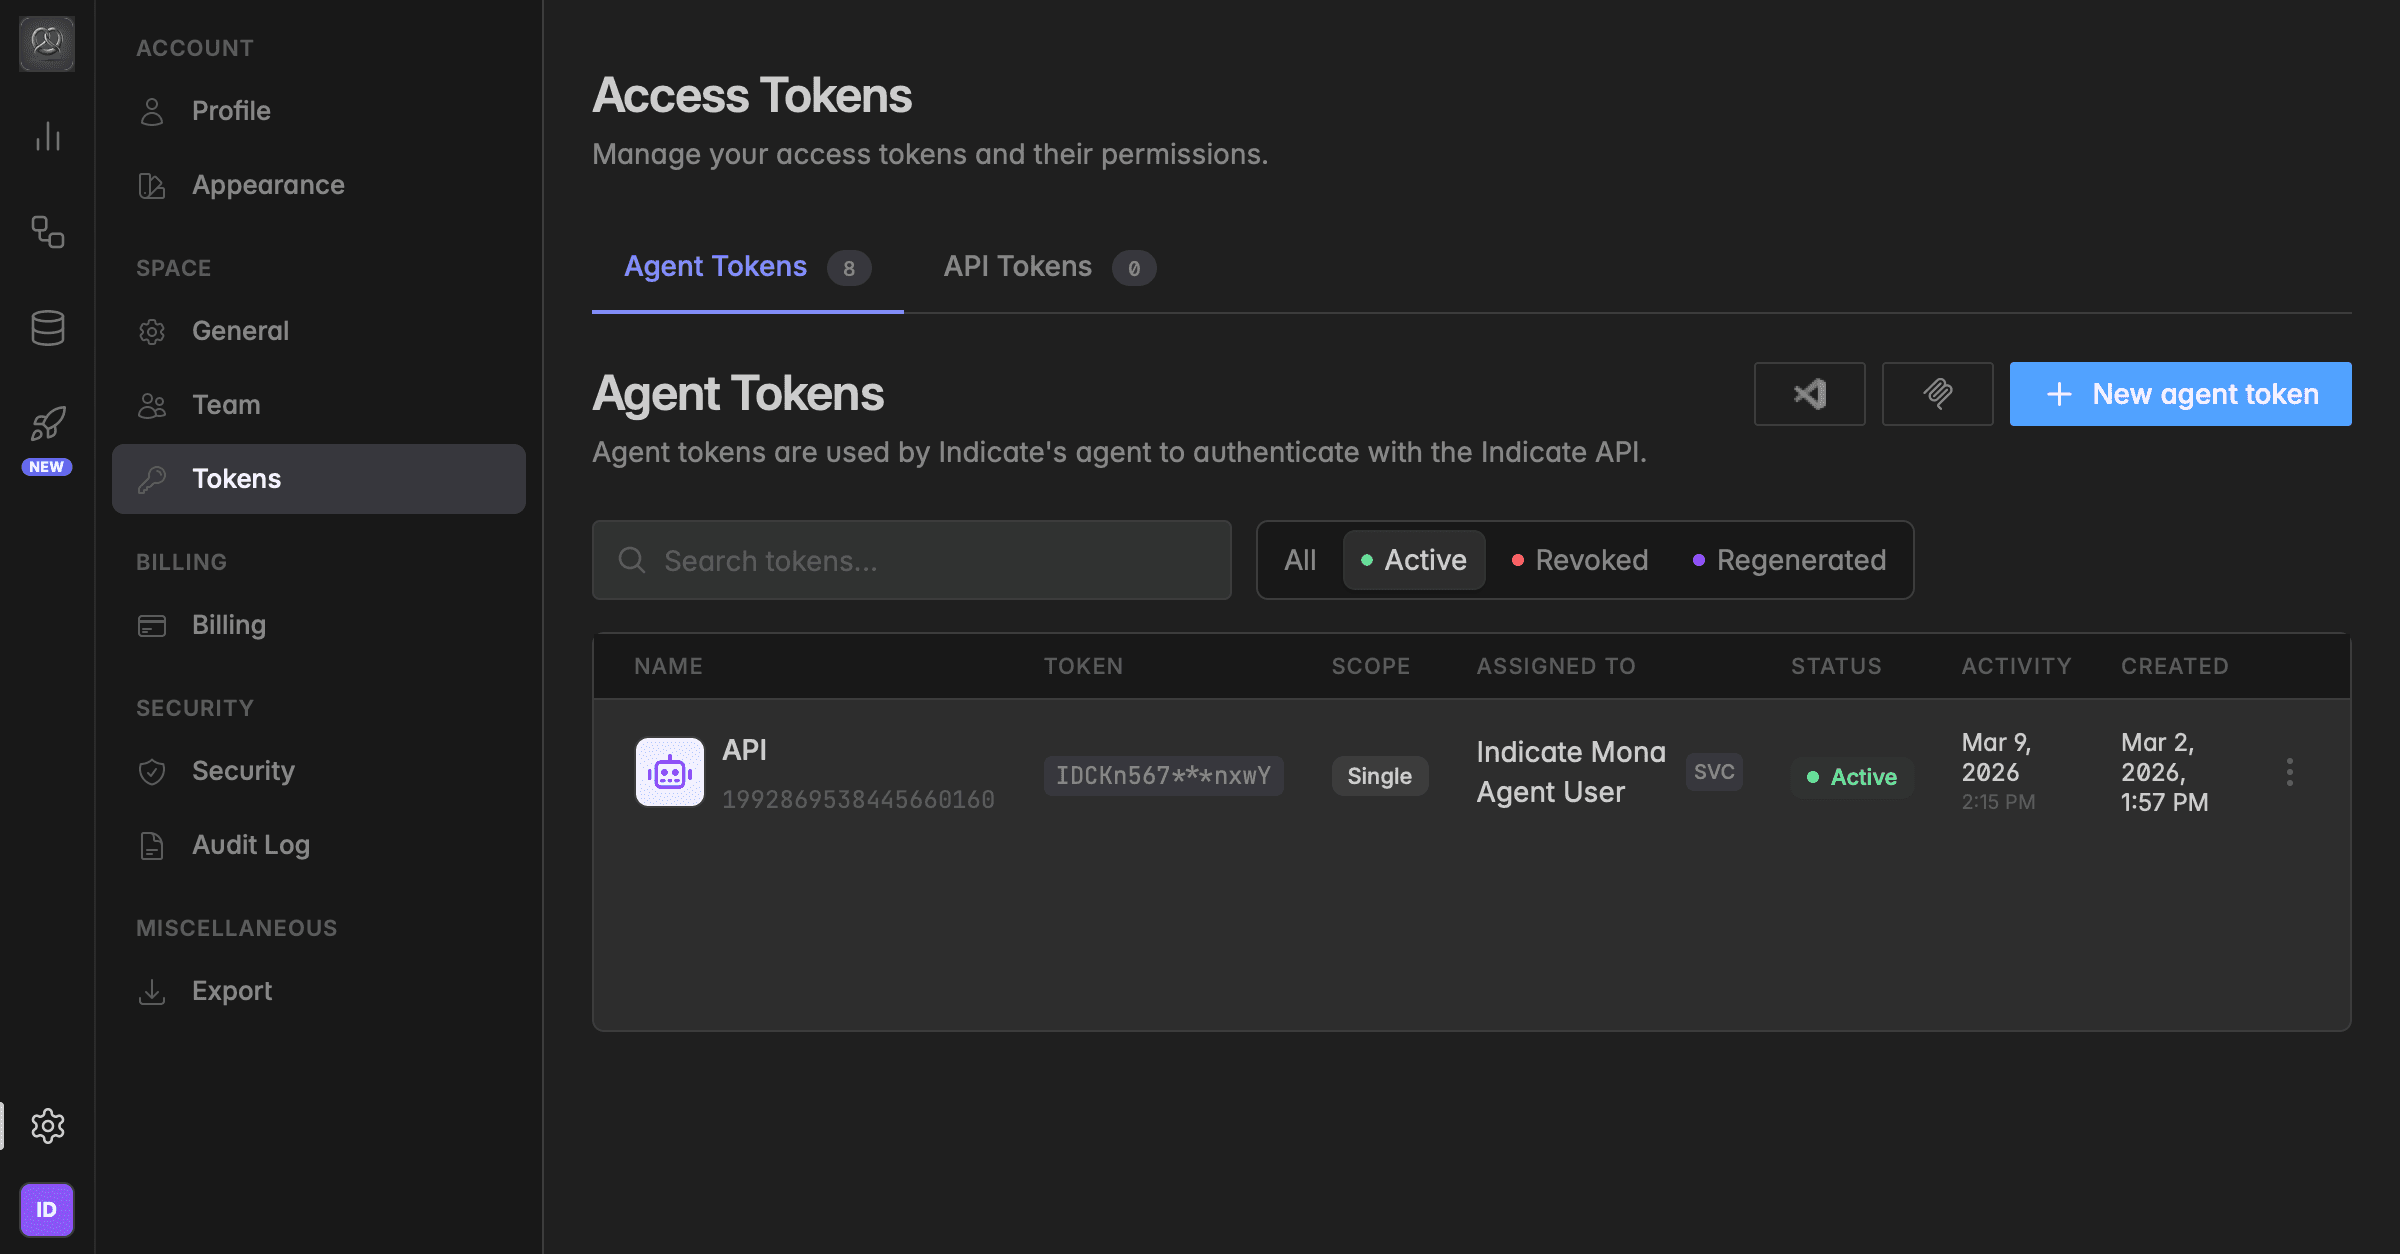
Agent tokens are credentials that allow AI agents and external tools to authenticate with the Indicate API on behalf of a user or service account. You can use them to connect Indicate to any compatible application, such as Claude, Langdock, VS Code, n8n, or custom integrations. The classic use case: you want your own Claude to query your Indicate metrics.
A token is paired with one account (a Member User for personal use, or a Service User for shared team use). Agent Tokens are available on the Core, Pro, and Enterprise plans, billed per seat by scope. See the pricing page for current prices.
Tokens can be regenerated at any time, the old token is immediately invalidated and a new one is displayed once.
After creation, the token is displayed only once. Copy and store it securely, it cannot be retrieved again.
Each agent token is billed as an additional seat. The first billing cycle is prorated from the creation date.
Only Owners and Admins can create, regenerate, or revoke agent tokens. All changes are recorded in the Audit Log under the API Tokens namespace.
What scope should I choose?
Every agent token has an access scope, chosen at creation and not changeable later:
Single-space: the token works only in the space where you created it.
Multi-space: the token works across every space the assigned account belongs to.
If you need to switch scope later, revoke the token and create a new one.
How do I create an agent token?
Decide the account and scope first, then:
Open Settings by clicking the gear icon in the bottom-left corner.
Go to
Settings→ Tokens and open the Agent Tokens tab.Click + New agent token in the top right.
Enter a Token name that tells your team what the token is for. Examples:
My Claude Connection,Marketing Team n8n. Generic names liketoken1make it hard to know what depends on the token later.Under Assign to user, select the account this token belongs to (a Member User or a Service User). The dialog shows the permissions the token will inherit.
Choose an Access scope: Single-space or Multi-space.
Toggle I acknowledge the additional billing. This is required to create the token.
Click Create token.
Copy the token immediately. It is shown only once. If you lose it, you have to regenerate.
Store the token somewhere safe.
Use a password manager. Never paste it into a Slack message or a public document, the token gives full access to the paired account's data.
How do I connect the token to my tool?
For MCP-compatible tools, the Agent Tokens list provides two shortcuts:
Install in VS Code: Get us from the VS code marketplace here.
View mcp.json: shows the MCP configuration JSON you can paste into Claude, n8n, Langdock, or any other MCP-compatible tool.
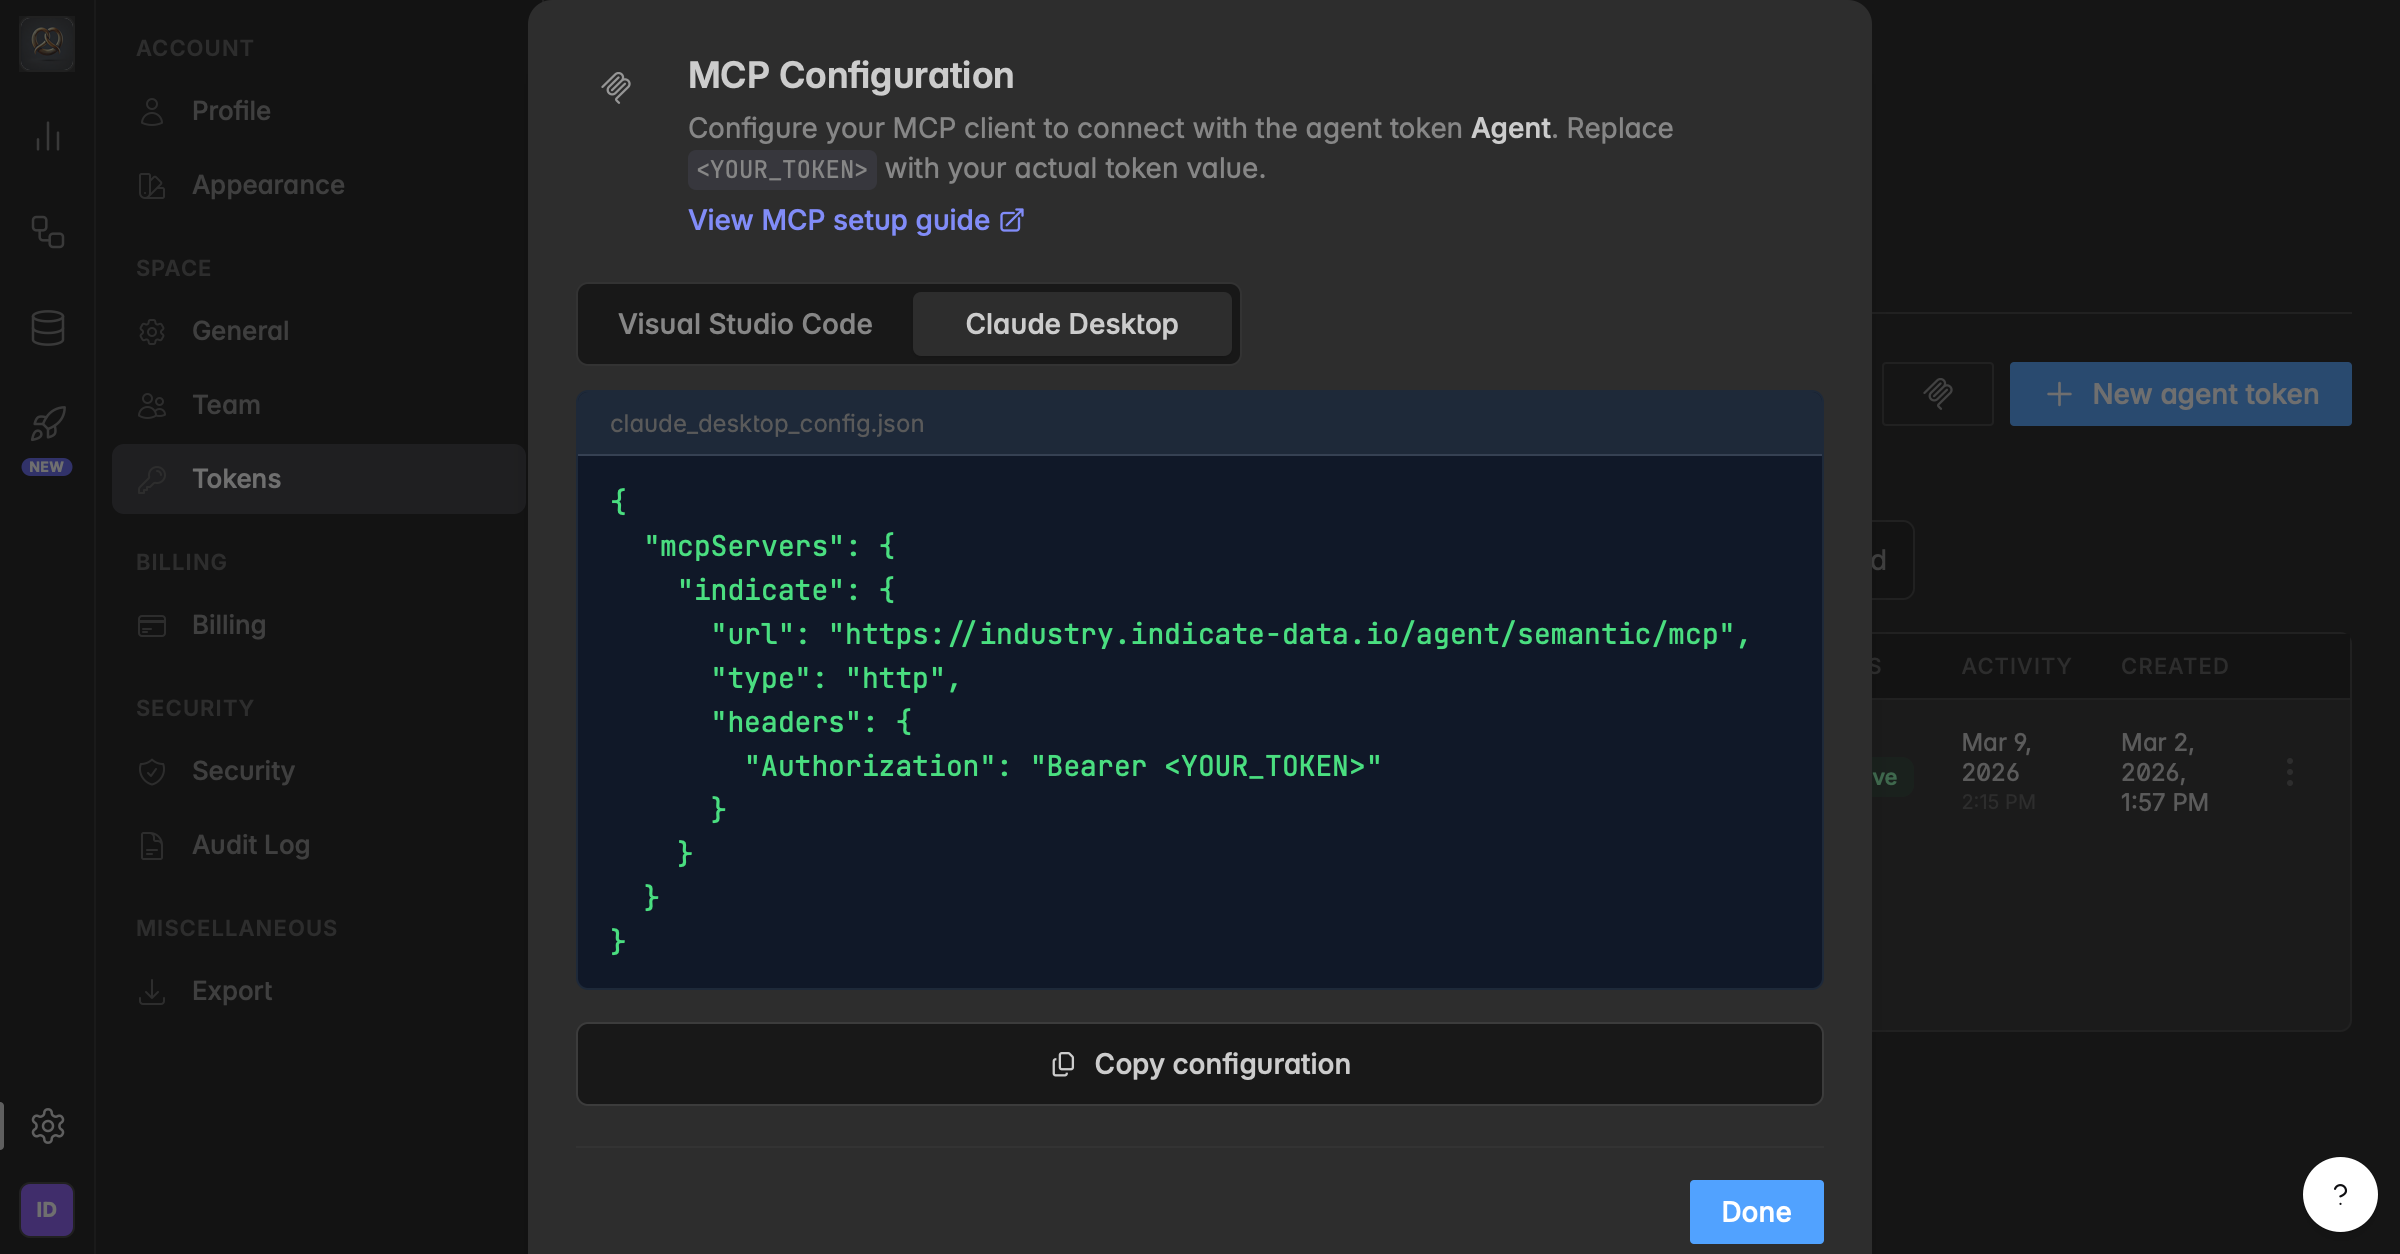
For other tools, paste the token into the tool's authentication configuration as described in that tool's documentation.
How do I revoke an agent token?
Revoke a token when the connection it powers should stop working, for example a leaked token, a departing team member, or a retired integration.
Go to
Settings→ Tokens and open the Agent Tokens tab.Find the token in the list. You can filter by Active or search by name.
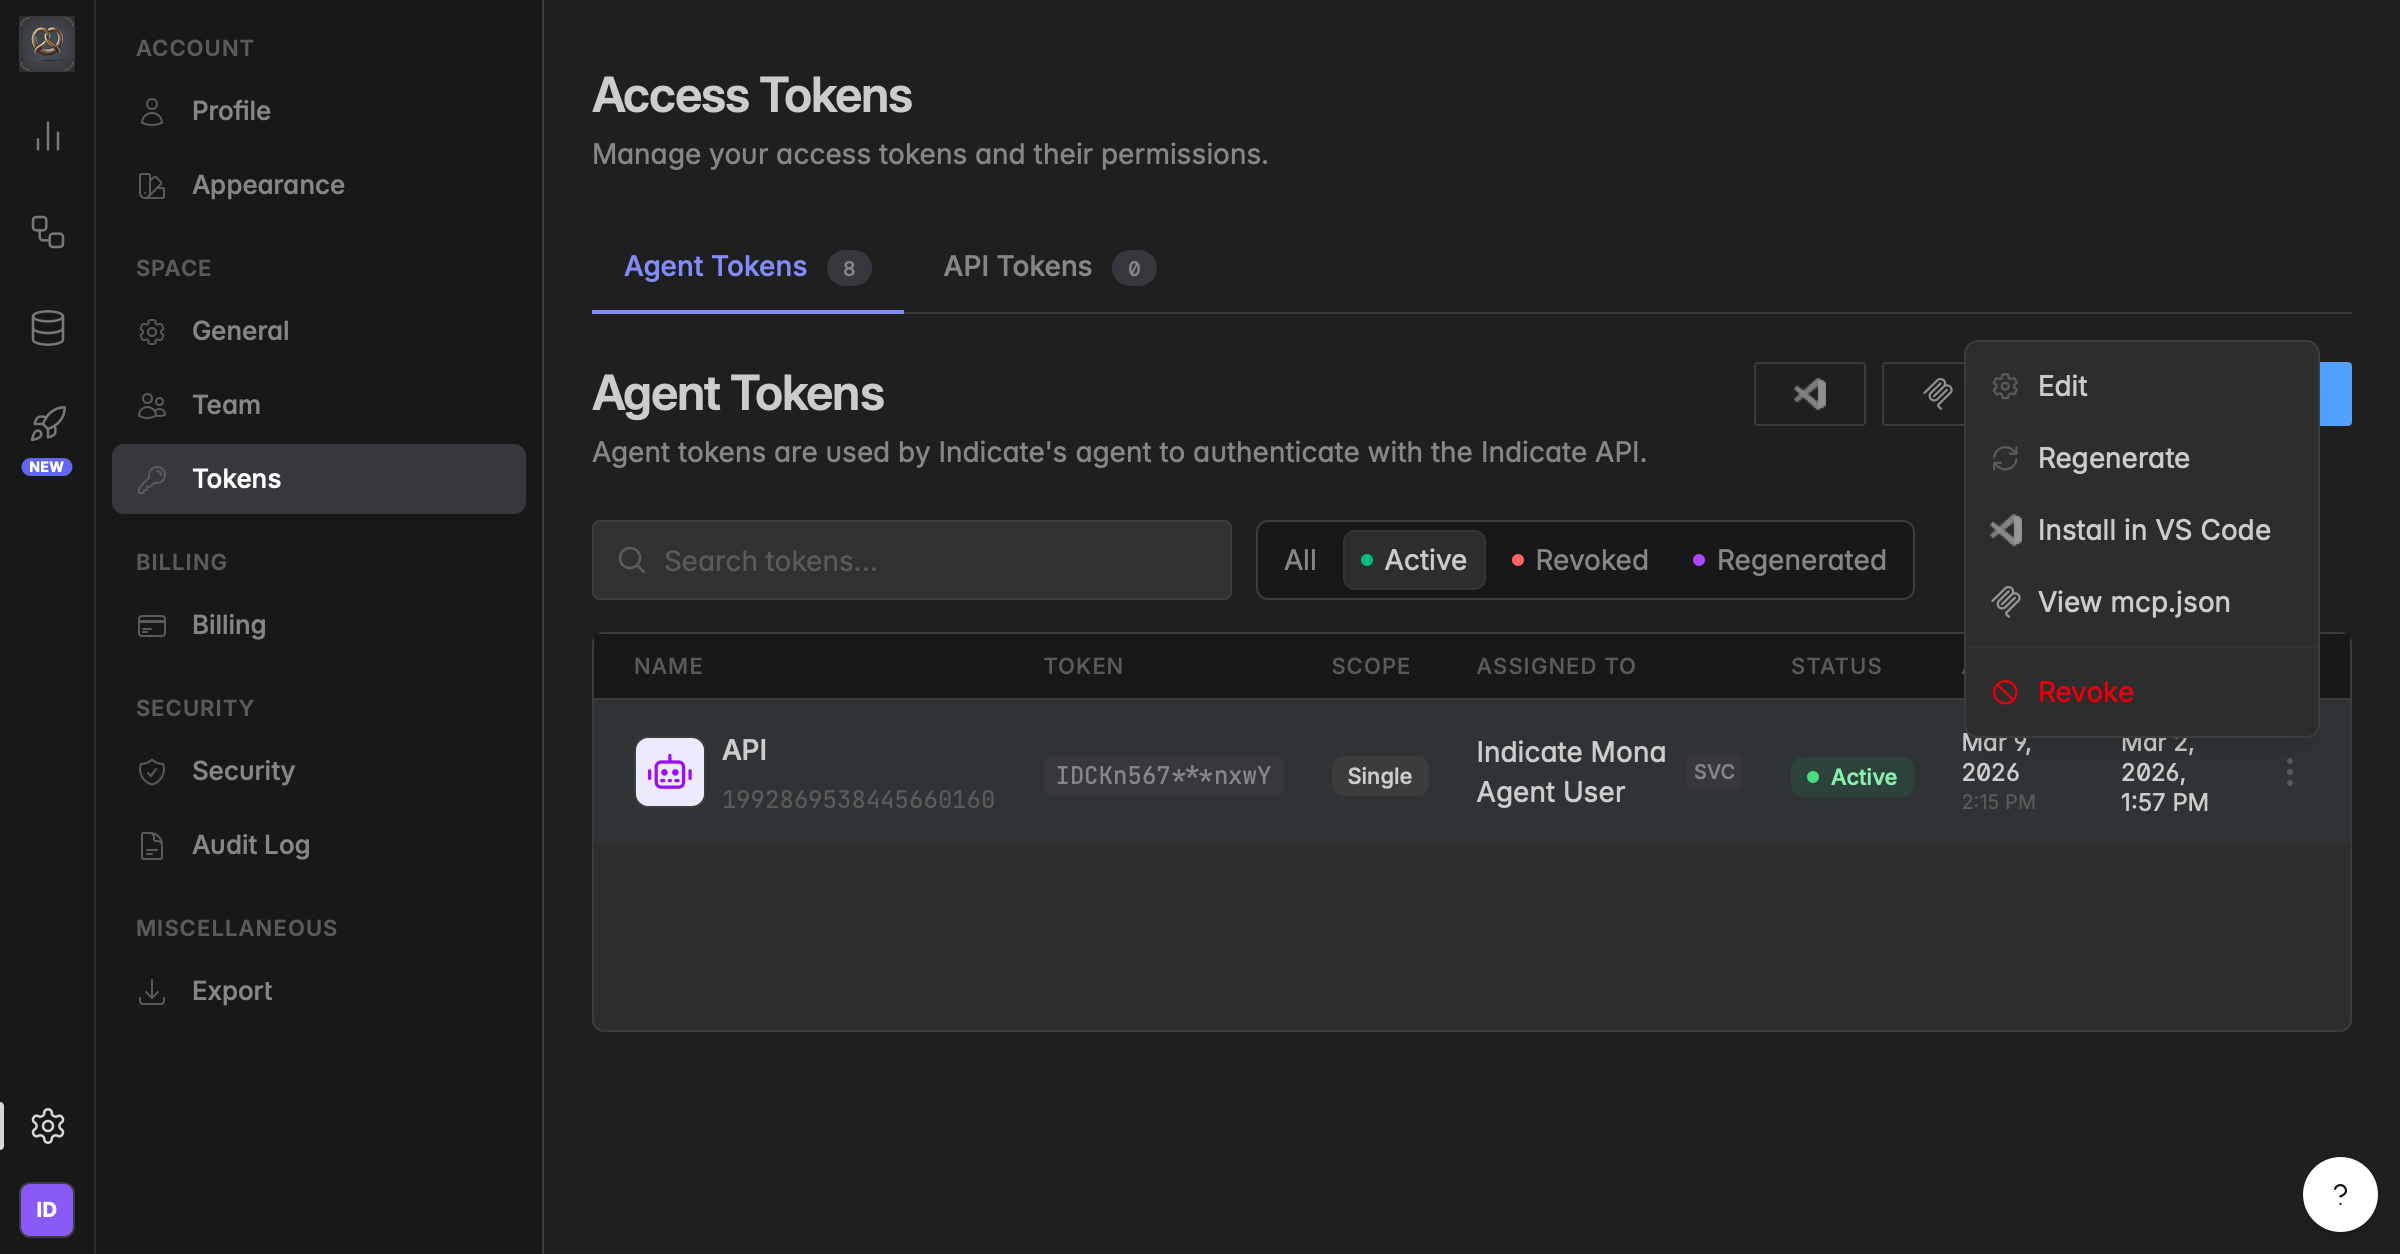
Hover over the token's row and click the
Remenu on the right.Select Revoke.
Confirm when prompted. The status changes to Revoked immediately.
Revoking is permanent.
A revoked token cannot be reactivated, and any tool using it fails to authenticate on its next request. The paired account stays intact. To restore access, create a new token and update the tool.
Regenerate vs. revoke: which do I use?
Regenerate issues a new token value for the same configuration. The old value stops working immediately, the new value is shown once, and the seat keeps billing without interruption. Use this to rotate a credential while keeping the integration.
Revoke deactivates the token entirely and stops the seat billing. To use the integration again, you create a new token from scratch.
Both options are in the same ⋮ menu, alongside Edit, Install in VS Code, and View mcp.json.
Troubleshooting
I assigned a token to the wrong user or account.
Open the
⋮menu on the token, choose Edit, select the correct account under Assigned user, and click Save changes. You can reassign a token at any time.
What is the difference between single-space and multi-space?
A single-space token works only in the space where you created it. A multi-space token works across every space the assigned account belongs to. Scope cannot be changed later, so revoke and recreate to switch.
How do I delete a token?
Tokens are not deleted, they are revoked. Open the
⋮menu and choose Revoke. The paired account stays intact.
I cannot click "Create User" button –> nothing seems to happen
To add users, you need admin rights in the respective Space. If the button is not responding, please contact the owner or admin of your space.
Why should I distribute my Agent across multiple Spaces?
AI models have a limited memory, also called Context Window. If a Space contains too many data sources, the model can start to overlook or forget important information. Distributing your Agent across multiple Spaces ensures clean contexts and higher accuracy. That said, Indicate is already suited for larger contexts, and as AI models continue to evolve, this limitation is becoming less and less of a concern.
Do I need to assign a new token for the Agent in each Space if i selected multi-space?
No. The system recognizes the Agent token and automatically links it to the existing Agent profile.
I created a new Space. Do I have to reconnect my Agent token?
No. If you are using the multi space Agent token, it automatically gets immediate access to all Spaces your Indicate user has access to. There is nothing to reconnect. Your Agent works seamlessly across all your Spaces and their data right away. If you use a single space agent token, it will only have access to the space it was created in.
Do I need to do anything else to chat with the data once the Agent User has been added to the Space?
No. The Agent has immediate access to all Insights in the new Space. It does not have access to raw data, only to the Insights built on top of your connected data sources. As soon as a new data source is connected to a Space, the Agent automatically gets access to its Insights as well. If you use tools like VS Code and your Agent via MCP is already connected, you can immediately start chatting with the new Space alongside all existing ones. The only thing you need to do outside Indicate: paste your token into the third-party tool you want to use it in.
Was this helpful?