
Create a new space
Learn how to create a new space in Indicate, choose your subscription tier and billing cycle, and enter the billing information needed to activate it.
What is a space?
A space is a separate workspace inside Indicate. It has its own dashboards, data sources, team members and subscription. You can switch between spaces at any time from the space switcher in the top left of the sidebar.
A hotel group, for example, can run one space per property, so each hotel team only sees its own data.
When do you need a new space?
You want to keep data for a second property, brand or client fully separate
A team needs its own dashboards without access to your existing space
You want a separate subscription and invoice for a specific business unit
You want to separate data access for AI, then create a dedicated space and share only the data sources the AI should be able to access
Only need to share dashboards? If your goal is simply to give someone access to existing data, invite them to your current space instead or create a Flying KPI report to sent out a dashboard via email. See Invite a team member. A new space always starts its own subscription.
How to create a new space
Open the space switcher by clicking your space icon
In the top left of the sidebar, click your current space name. A dropdown opens showing Search Spaces and all spaces you have access to.
Click
+ Create new spaceAt the bottom of the dropdown, click
+ Create new space. The Create a new space dialog opens on step 1 Space & Plan.Name your space
Click the Space name field and type a name, for example your property or brand name. The name can be up to 128 characters and must be at least 3 characters.
Pick a name your team recognises. The space name is what everyone sees in the space switcher, so a clear property or brand name saves confusion later.
Choose your subscription tier
Under Subscription tier, select the plan that fits your team. Each card describes the tier and shows its price, which updates when you change the billing period in the next step. The plans and prices are listed in detail on our pricing page.
Choose your billing cycle
Under Billing period, choose Yearly Save some money or Monthly.
Yearly is billed annually and saves you money compared to monthly billing. The dialog shows your exact yearly saving below the buttons. Monthly is billed every month at the higher rate.
The Total line at the bottom always reflects your current selection, so check it before you continue.
Click Next
Click
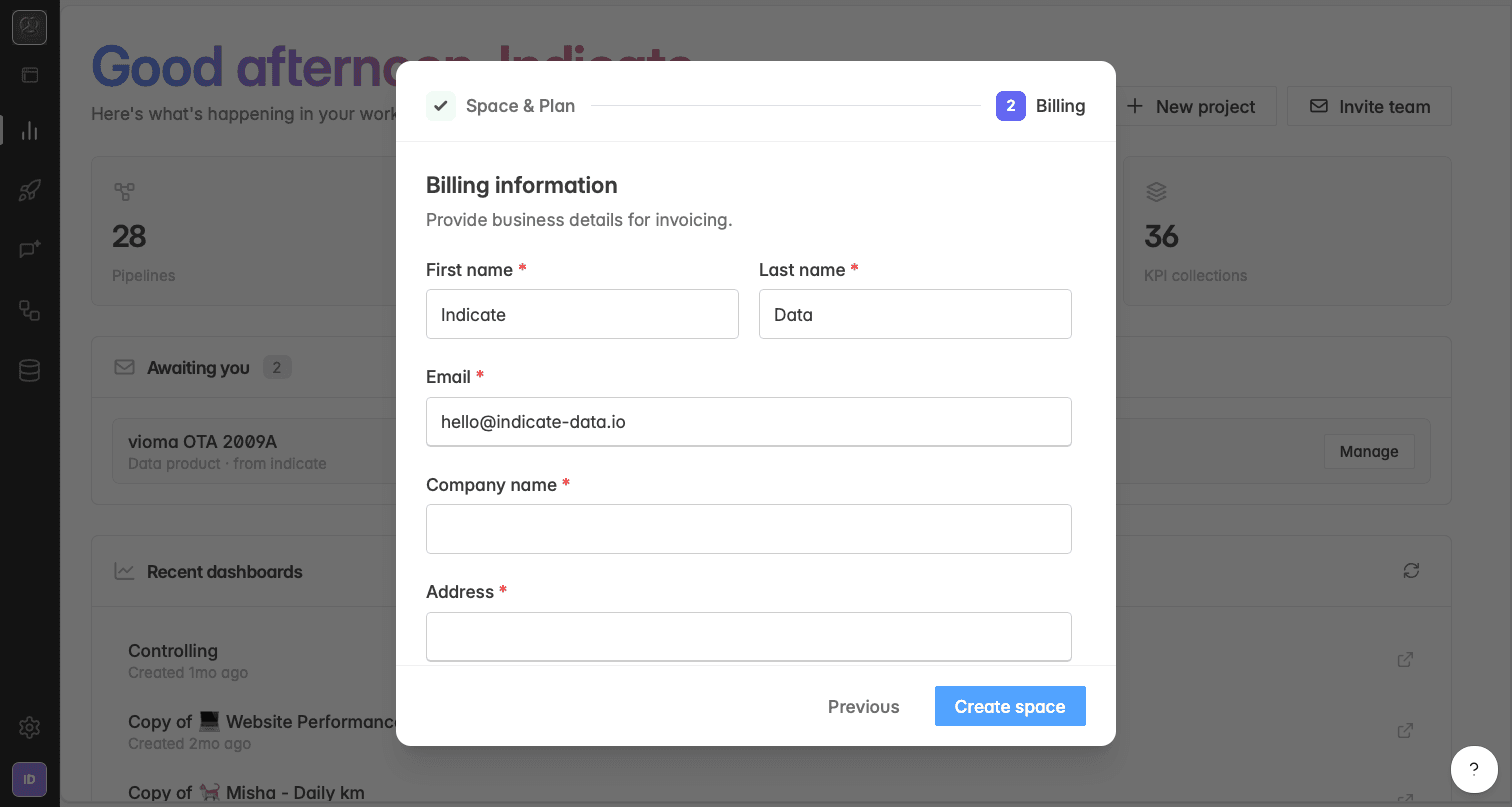
Nextto move to step 2 Billing.Enter your billing information
Fill in the billing details for this space. These fields are required:
First name and Last name
Email
Company name
Address
Postal code and City
Country
VAT ID is optional. Enter it if your company is VAT registered so it appears on your invoices.
Use the email that should receive invoices. The Email field here is the billing contact for this space. It does not have to be the address you log in with.
Billing is per space. Each space has its own billing details and its own invoice. Entering a different company here does not change the billing information of your other spaces.
Accept the terms
Turn on the toggle to confirm that you accept the terms and conditions (AGB) and have reviewed the pricing information. Both are linked directly in the dialog.
Create the space
Click
Create space. Your new space is created and you can switch to it from the space switcher.
Troubleshooting
The Create space button does nothing.
- Check that every required field is filled in. Required fields are marked with a red asterisk. The terms toggle must also be switched on.
I chose the wrong billing cycle.
- Click Previous to return to 1 Space & Plan and change your selection before creating the space.
My billing details are wrong after creating the space.
- You can update them later in your billing settings.
Was this helpful?