
Templates Marketplace
Install ready-made dashboards from the marketplace, update them when the publisher releases a new revision, and publish your own templates. Includes when to duplicate instead.
What is a dashboard template?
A dashboard template is a ready-made dashboard that you can install into your own space with one click. It contains the layout, the widgets, and the metric configuration, but no data. When you install a template, Indicate creates a normal dashboard in your space and maps it to your own Insights.
You can also work the other way round and publish one of your own dashboards as a template, either publicly or for selected spaces only.
Template or duplicate?
There are two ways to reuse a dashboard in Indicate. Pick the one that fits how much control the receiving side should have.
Template: the receiving space stays in control. A template has revisions. Every space that installed it sees when a newer revision exists and decides on its own whether to update, because an update also overwrites local changes in the installed dashboard. Use it when other teams should start from your dashboard and then own their version.
Duplicate: the source dashboard stays in control. Whoever owns it can resync every copy at any time, and that overwrites all changes made in the copies without asking. Use it when you maintain the same dashboard for several hotels or spaces yourself and want them all to stay identical. See Duplicate a dashboard.
Note: This is not the same as the integration catalogue under
Data sources. That catalogue lists the systems you can connect. Dashboard templates are about ready-made dashboards.
When do I need this?
You want to start with a proven dashboard instead of building every widget yourself.
You run several spaces, for example one per property, and want the same dashboard in each of them, with each space deciding when to take updates.
You built a dashboard that other spaces should be able to install, for example inside your hotel group.
Where do I find the templates?
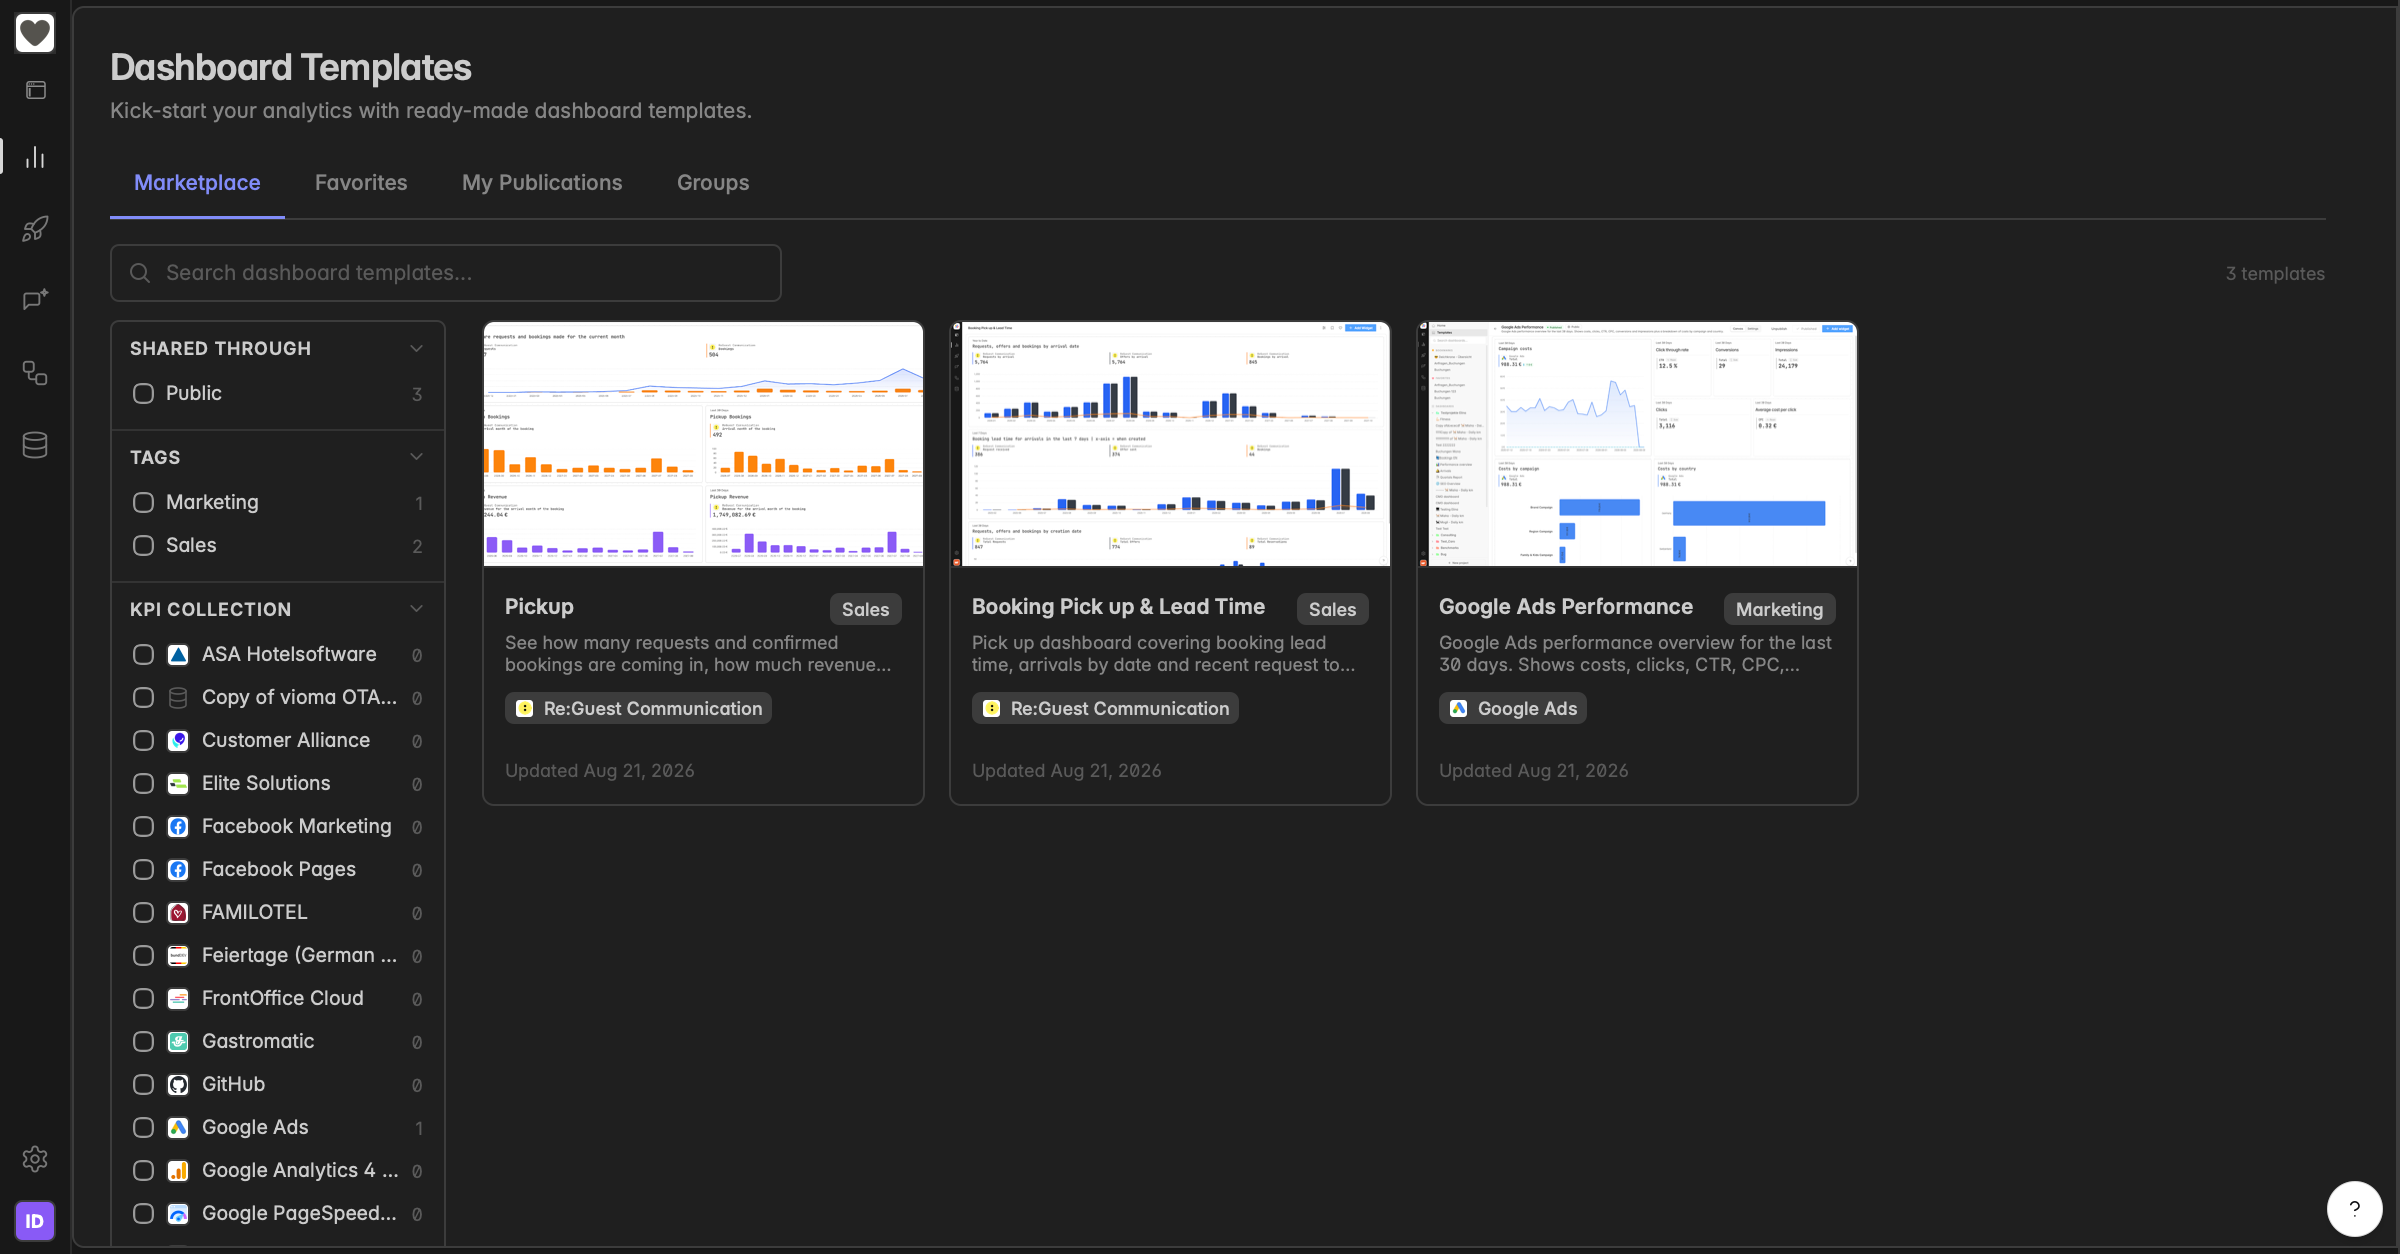
In the left sidebar, click Templates at the top. The page Dashboard templates opens with four tabs:
Marketplace: all templates you can install.
Favorites: the templates you marked with the heart.
My templates: the templates you created yourself, published or still in draft.
Groups: the audiences you own, the spaces invited into them, and the groups other spaces invited you into.
On the left of the Marketplace tab you can filter by Shared through, Tags, and KPI collections. Use the search field to find a template by name.
How do I install a template?
Installing a template creates a new dashboard in your space. You choose the name and the project it lands in.
In the left sidebar, click Templates.
On the Marketplace tab, click the template you want. A detail view opens with the description and, under Included data, the KPI collections the template needs.
Click Use this template.
Enter a Dashboard name.
Click the Project dropdown and choose the project the dashboard should belong to. General is preselected.
Under Data, open the dropdown next to each entry in the Template column and pick the matching Insight of This space. You can only pick an Insight that is built on the same KPI collection. Choose Skip to leave an entry unmapped, its widgets then stay empty.
Click Create dashboard. The dashboard opens with all widgets filled with your own data.
Note: The dashboard is now a normal dashboard. You can rename it, edit its widgets, or delete it without affecting the template. It stays linked to the template, so you can update it later, see the next section.
How do I update an installed dashboard when the template changes?
Every dashboard installed from a template shows a Template button in its toolbar. This is where the versioning lives: the publisher releases revisions, and you decide if and when your dashboard follows.
Open the installed dashboard. When a newer revision exists, the Template button in the toolbar carries an Update badge.
Click Template. The dialog shows the installed revision, the latest revision, and two tabs.
On the Changelog tab, read what the publisher changed. Revisions newer than the one you installed are marked New.
On the Remapping tab, check which of your Insights each template source reads from. A source the publisher added since you installed is marked New and needs a target. A source the publisher removed is marked Removed.
Click Update to the latest revision. If you only changed the mapping, click Remap & rebuild instead. If you are already on the latest revision and want to undo local changes, the button reads Restore from the latest revision.
In the confirmation dialog, turn on I understand this dashboard's local changes will be lost and confirm.
Note: Either way the dashboard is rebuilt: widgets you added yourself are removed, and edits to the template's widgets are reverted. Your Insights and the data in them are never changed. If you customised the dashboard and want to keep it, do not update. Nothing happens until you click the button.
If the publisher took the template off the marketplace, the dialog shows Archived. You can still rebuild from the last revision. If access to a private template was withdrawn, the dashboard keeps working but can no longer be updated.
What is Insights mapping?
Insights mapping is the step that connects a template to your data. It appears in the Use this template dialog under Data and on the Remapping tab of the Template dialog.
The Template column lists the KPI collections the template was built on. In the This space column you pick the Insight in your space that delivers this data. A template built on Re:Guest Communication needs an Insight in your space that is based on the same KPI collection.
Note: Only the configuration of a template is published. The data always comes from your own space, which is why this mapping is required.
How do I create my own template?
There are two ways to get to a template. You can build one from scratch in the template editor, or you can turn a dashboard you already have into a template.
Option 1: Build the template from scratch
Use this when there is no dashboard yet, or when the template should show something different from your existing dashboards.
In the left sidebar, click Templates.
Open the My templates tab and click New template.
In the dialog New dashboard template, enter a Display name.
Click the Description field and describe what the dashboard shows. This text appears on the marketplace card.
Click the Categories field, type a category, for example
Sales, and press Enter. Repeat for further categories.Turn on Private if only selected groups should see the template. Leave it off to list it publicly.
Click Create template. The template editor opens with the status Draft.
Click Add your first widget and build the widget like on a normal dashboard. Add further widgets with Add widget until the template is complete.
Click Publish in the top right corner.
Option 2: Create the template from an existing dashboard
Use this when the dashboard already exists and you want to share the same layout as a template.
In the left sidebar, hover over the dashboard you want to use and click the
⋮icon that appears next to its name. Or open the dashboard and click the⋮icon at the top right of the toolbar.Select Create template.
Enter the Display name, Description, and Categories for the template, and turn on Private if needed.
Click Create template. The dashboard is copied into a new template and saved as a draft under My templates. The template editor opens with the widgets of your dashboard.
Adjust the widgets if needed, then click Publish in the top right corner.
Note: The template stays a draft until you publish it. Nobody else sees it in the marketplace before that. Changes you make to the template afterwards do not affect the dashboard it came from.
How do I add a preview screenshot and edit the template details?
The preview screenshot is what other spaces see on the marketplace card, so a template without one is easy to overlook.
Open the template and click the Settings tab.
Under Preview screenshot, click Upload screenshot and choose your image. Use Replace or Remove to change it later.
Adjust Display name, Description, or Categories if needed.
Click Save changes. Changes go live the next time you publish.
Who can see my template?
You set it in the Settings tab under Audience, or by clicking the audience badge in the header of the Canvas tab.
Private off: the template is public, every space can see and install it.
Private on: only the groups you pick below can see the template. Without a group, the template is private but not shared with anyone.
To change it:
Open the template and click the Settings tab.
Under Audience, set the Private toggle.
If Private is on, turn on every group that should get access under Groups.
Click Save audience. Audience changes apply immediately, no republish needed.
How do I create a group and invite a space?
A group is a named audience. You invite spaces into it and can then share private templates with the whole group. You can have several groups.
In the left sidebar, click Templates and open the Groups tab.
Under Groups you own, click New group.
Enter a Name, for example
Key accounts, and optionally a description that says which spaces belong in this group.Click Create group.
Click the new group in the list to open it.
On the Spaces tab, click Invite a space.
Search for one of your own spaces by name, or paste the space ID of the other space. An admin there finds the ID under
Settings→General, and on their Groups tab under Your space ID.Click Send invitation. The space appears with the status Pending until an admin there accepts. Accepted spaces show Active, declined ones Declined. Use Invite again to ask a second time.
The invited space sees the invitation on its own Groups tab under Invitations and accepts or declines it there.
How do I publish or update a template?
Publishing makes the current state of the template available in the marketplace. Every publish is recorded as a revision, and spaces that installed the template see the new revision as an Update.
Open the template and click Publish in the top right corner. After the first publish the button reads Publish changes.
In the dialog Publish to the marketplace, check the KPI collections used by the template.
Click the Change summary field and describe what changed, for example
Added churn breakdown and fixed revenue totals. Other spaces read this in their changelog before they update.Click Publish. The status badge changes from Draft to Published.
When you edit a published template, its status changes to Unpublished changes until you publish again. The Revision history in the Settings tab lists every published revision, newest first.
To take a template off the marketplace, open it and click Unpublish in the top right corner. Dashboards that other spaces already installed keep working.
Note: Only the configuration of your dashboard is published. None of your data is shared. Other spaces install the template and connect their own Insights. Publishing a new revision never changes an installed dashboard by itself, the other space has to update.
Troubleshooting
My installed dashboard shows no data
- The Insights mapping is missing or points to the wrong Insight. Open the dashboard, click Template in the toolbar, fix the mapping on the Remapping tab and click Remap & rebuild. If your space has no Insight on the same KPI collection, connect that source first.
The Template button does not appear
- The button only appears on dashboards installed from a template and only for members with at least the User role. Duplicated dashboards do not have it, they are updated by the owner of the source dashboard instead.
I updated and lost my own widgets
- That is expected. An update rebuilds the whole dashboard from the template. If you want to keep local changes, do not update, or duplicate the dashboard first and update only the original.
The other space cannot see my private template
- Check three things in this order: the group is switched on under Audience in the template settings, the space was invited to that group, and the invitation is no longer Pending. An admin in the other space has to accept the invitation first.
My template is not in the Marketplace tab
- Templates you create yourself are listed under My templates. Also check the status badge: a template that still says Draft was never published, and Unpublished changes means the marketplace still shows the previous revision.
I cannot find the space I want to invite
- The search only lists spaces you are a member of. For any other space, ask an admin there for the space ID and paste it into the search field.
Was this helpful?